Wie man Grate von CNC-gefrästen Aluminiumteilen entfernt, ohne die Kanten zu beschädigen
CNC-gefräste Aluminiumteile müssen nach dem Fräsen, Bohren, Gewindeschneiden oder Nuten häufig entgratet werden. Die Herausforderung besteht nicht nur darin, Grate zu entfernen, sondern dies auch zu tun, ohne kritische Kanten abzurunden, sichtbare Oberflächen zu verformen, Gewinde zu beschädigen oder Präzisionsmaße zu verändern.
Ein schonender Entgratungsprozess sollte das Bauteil schützen und gleichzeitig saubere Kanten und eine gleichmäßige Oberfläche erzeugen. Bei vielen Aluminiumteilen bedeutet dies, die richtige Bearbeitungsmaschine, das passende Schleifmittel, die richtige Polierpaste, das richtige Belastungsverhältnis und die optimale Zykluszeit zu wählen, anstatt einfach das aggressivste Schleifverfahren anzuwenden.
Warum CNC-gefräste Aluminiumteile sorgfältig entgratet werden müssen
Aluminium ist weicher als Stahl und Edelstahl. Dadurch lässt es sich zwar leichter bearbeiten, ist aber auch anfälliger für Kratzer, Dellen, Schmierstellen oder Überrundungen beim Entgraten. Ein Verfahren, das für Stahlteile gut geeignet ist, kann für Aluminium zu aggressiv sein.
Typische Stellen für Gratbildung sind Bohrungen, Gewindebohrungen, gefräste Nuten, sich kreuzende Kanten, Taschen, dünne Wände und scharfe Ecken. Bei zu starker Oberflächenbearbeitung können diese Merkmale ihre definierte Geometrie verlieren.
Häufige Risiken beim Entgraten von Aluminium
Überrundete Kanten
Eine zu lange Zykluszeit oder aggressive Medien können zu viel Material von Funktionskanten abtragen, insbesondere bei dünnen Strukturen.
Oberflächenbeulen
Zu schweres Medium oder ein ungünstiges Beladungsverhältnis können Aufprallspuren verursachen, insbesondere auf sichtbaren oder dekorativen Aluminiumoberflächen.
Beschädigung des Gewindes
Gewindebohrungen und Feingewinde können beeinträchtigt werden, wenn die Form, Größe oder Bearbeitungszeit des Mediums nicht sorgfältig ausgewählt wird.
Medienunterkunft
Medien können sich in Löchern, Schlitzen und Sacklöchern verfangen, wenn ihre Größe zu nah an den Abmessungen der Bauteilmerkmale liegt.
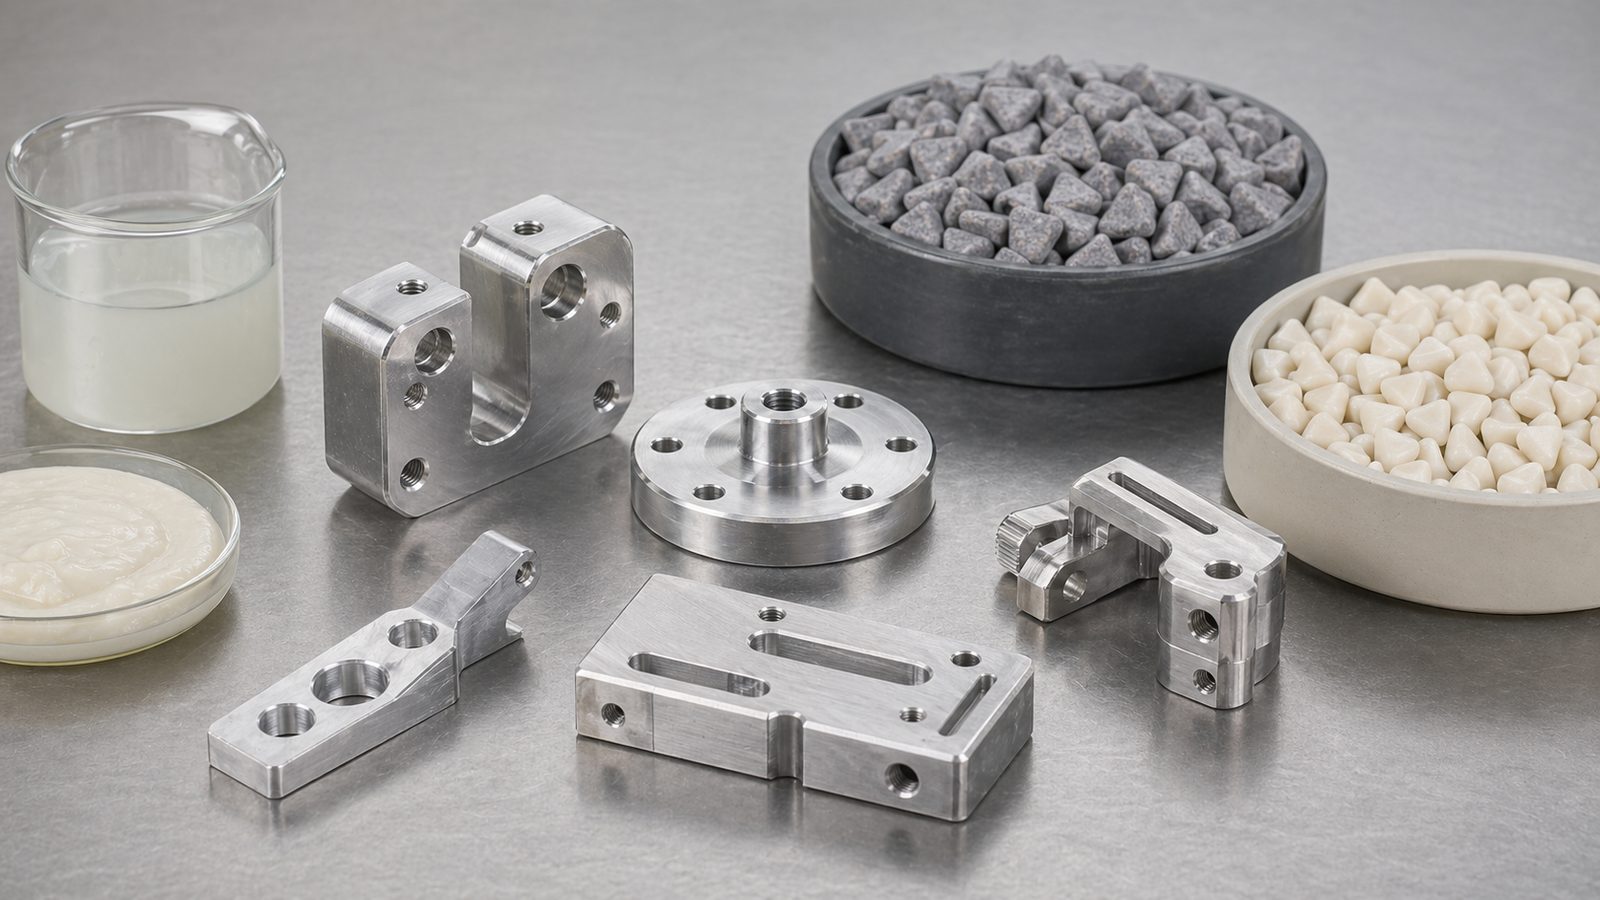
Wählen Sie die richtige Oberflächenbearbeitungsmaschine
A Vibrationspoliermaschine wird häufig zum Entgraten von CNC-gefrästen Aluminiumteilen in Serienfertigung eingesetzt, da es eine gleichmäßige Medienbewegung und eine gute Prozesskontrolle gewährleistet. Für lange oder größere Aluminiumbauteile, Badewannenvibratoren könnte besser geeignet sein.
Bei sehr kleinen, empfindlichen oder detailreichen Teilen sollte die Maschinenauswahl durch Stichprobenprüfung bestätigt werden. Ziel ist es, eine ausreichende Relativbewegung zwischen Schleifmittel und Grat zu erzeugen und gleichzeitig einen starken Teileaufprall zu vermeiden.
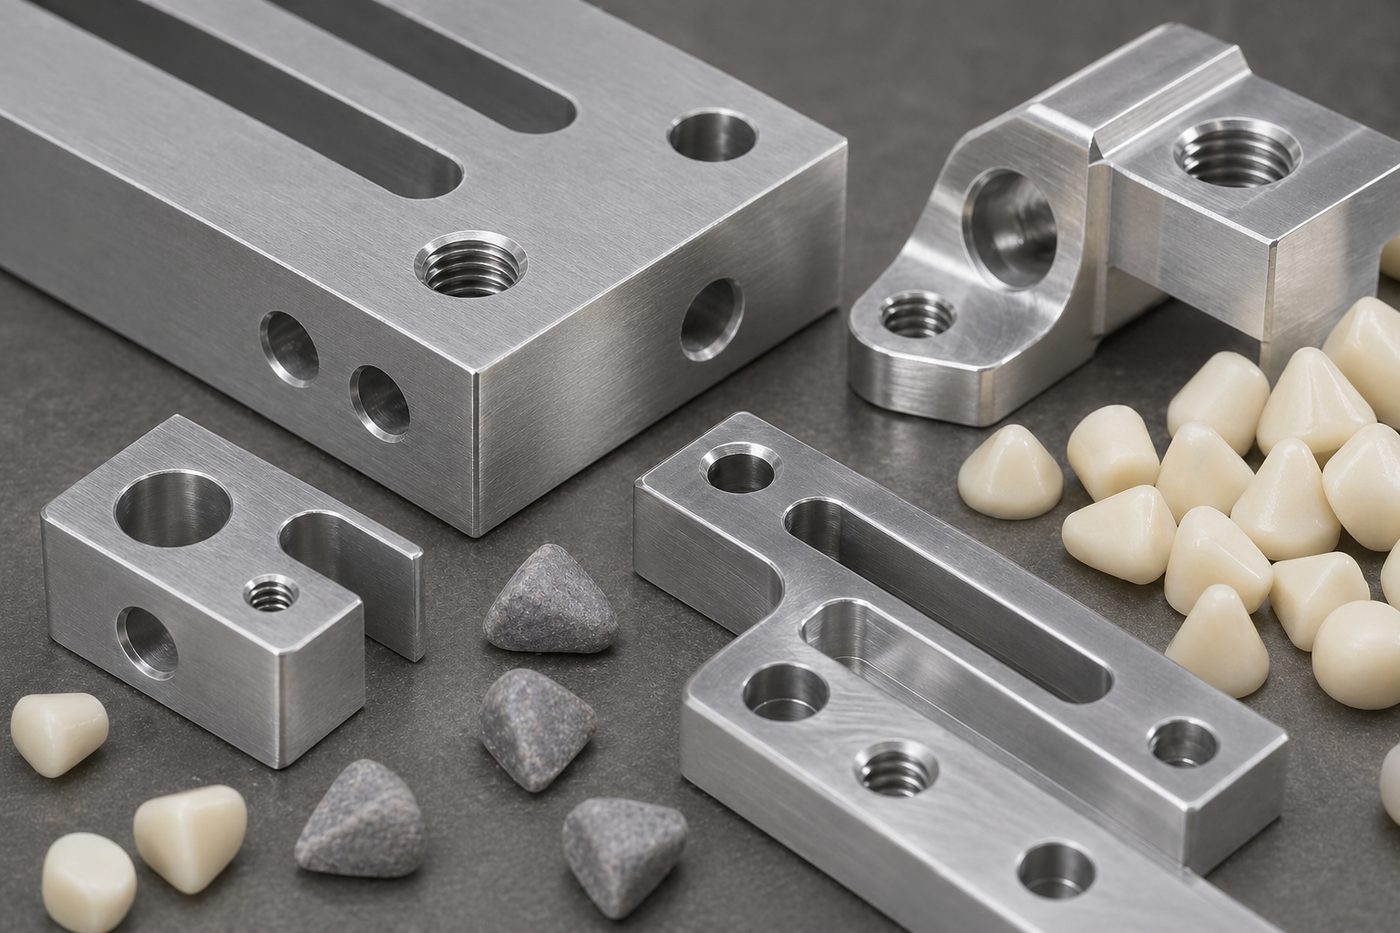
Kunststoff- oder Keramikmedien für Aluminium?
Für viele Aluminiumteile Kunststoffmedien ist eine sicherere erste Option. Es ist leichter als Keramikmedien und kann das Risiko von Aufprallspuren verringern, insbesondere bei weicheren Aluminiumlegierungen und Teilen mit sichtbaren Oberflächen.
Keramische Medien Das Verfahren kann weiterhin nützlich sein, wenn stärkere Grate entstehen oder ein schnellerer Schnitt erforderlich ist. Allerdings müssen Körnung, Form, Größe und Zykluszeit sorgfältig ausgewählt werden, damit der Prozess nicht zu aggressiv wird.
| Zustand des Teils | Empfohlener Ausgangspunkt | Grund |
|---|---|---|
| Kleine Grate auf sichtbaren Aluminiumoberflächen | Kunststoffmedien mit geeigneter Mischung | Schonendere Wirkung und geringeres Risiko von Dellen |
| Mittlere Grate an nicht dekorativen Teilen | Feine Keramikmedien oder ausgewählte Kunststoffmedien | Gleicht Gratentfernung und Oberflächenkontrolle aus |
| Dünne Wände oder scharfe Funktionskanten | Kurzer Testzyklus mit milden Medien | Verringert das Risiko von Überrundung |
| Teile mit vielen Löchern oder Schlitzen | Mediengröße mit den Abmessungen des Features verglichen | Verhindert Medieneinlagerung und manuelle Nachbearbeitung |
| Teile, die eine glänzendere Oberfläche erfordern | Entgraten, gefolgt von Polieren oder Glätten | Entgraten und Polieren erfordern möglicherweise separate Arbeitsschritte. |
Verwenden Sie die richtige Mischung und den richtigen Wasserdurchfluss.
Oberflächenbehandlungen Sie helfen, die Oberfläche zu reinigen, Schaumbildung zu kontrollieren, Flecken zu reduzieren, die Schmierung zu verbessern und gelöste Partikel abzutransportieren. Dies ist besonders wichtig für Aluminium, das empfindlich auf Flecken und Oberflächenverschmutzungen reagieren kann, wenn die Prozesschemie nicht geeignet ist.
Die richtige Mischung sollte einen reibungslosen Medientransport gewährleisten und die Oberfläche beim Nassschleifen sauber halten. Zu wenig Flüssigkeit kann den Prozess rau und trocken machen. Zu viel Flüssigkeit kann die Schleifleistung verringern. Die endgültigen Einstellungen sollten mit realen Werkstücken getestet werden.
Empfohlenes Testverfahren
Vor der Freigabe der Serienproduktion sollte das Bauteil mit verschiedenen Medien und Zykluszeiten getestet werden. Es genügt nicht, nur zu beurteilen, ob der Grat entfernt ist. Ein vollständiger Test sollte Maßhaltigkeit, sichtbare Oberflächen, Bohrungen, Gewinde, Schlitze, Zykluszeit, Reinigungsergebnis und die saubere Ablösung des Strahlmittels vom Bauteil prüfen.
- Beginnen Sie mit dem schonendsten Verfahren, mit dem sich der Grat entfernen lässt.
- Kritische Kanten unter gleichmäßiger Beleuchtung prüfen.
- Prüfen Sie Gewindelöcher und kleine Löcher auf mögliche Medienbefestigungen.
- Vergleichen Sie das Oberflächenbild vor und nach der Oberflächenbehandlung.
- Zykluszeit, Wirkstoffkonzentration, Medientyp und Beladungsverhältnis erfassen.
Häufige Fehler, die es zu vermeiden gilt
- Die Verwendung von groben Schneidmedien, wenn der Grat bereits klein ist.
- Um die falsche Medienwahl auszugleichen, wird ein langer Zyklus durchlaufen.
- Bei der Auswahl der Mediengröße werden Gewindebohrungen und -schlitze nicht berücksichtigt.
- Empfindliche Aluminiumteile werden zusammen mit schweren Teilen in derselben Charge vermischt.
- Erwartet wird, dass ein einziger Prozess gleichzeitig das Entgraten und Hochglanzpolieren übernimmt.
Verwandte Lösungen
Wenn Sie ein Entgratungsverfahren für CNC-Aluminiumteile entwickeln, können Ihnen diese Ressourcen beim Vergleich von Maschinen und Verbrauchsmaterialien helfen:
Benötigen Sie ein Entgratungsverfahren für Ihre Aluminiumteile?
Senden Sie uns Ihre Aluminiumlegierung, Teilezeichnungen oder Fotos, die Position des Grates, die Abmessungen von Bohrungen und Schlitzen, die gewünschte Oberflächenbeschaffenheit und die Produktionsmenge. JINTAIJIN empfiehlt Ihnen gerne die passende Maschine, das geeignete Medium, die geeignete Reinigungslösung und das passende Prüfverfahren für die kontrollierte Entgratung.
 +86-592-2381506


 IPv6-Netzwerk unterstützt